

 Français
 Español
 Italiano
 Português
 Deutsch
ZiGate Wi-Fi v1.3 · Zigbee2MQTT
ZiGate Wi-Fi v1.3 with Home Assistant
Flash the ESP8266 and JN5168 firmware over USB, set up Wi-Fi, then install Zigbee2MQTT ZiGate in Home Assistant. To use the flasher, open this page in Chrome or Edge on a computer.
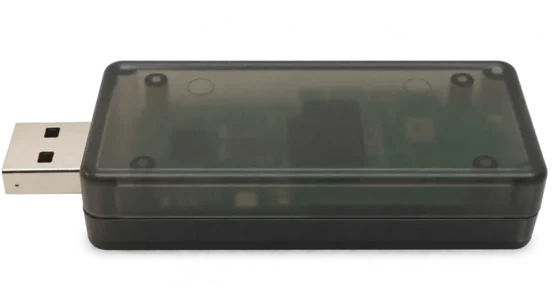
Install both firmware images
USB flashing
Test versionConnect the Wi-Fi module on its own
Wi-Fi 1.1.1
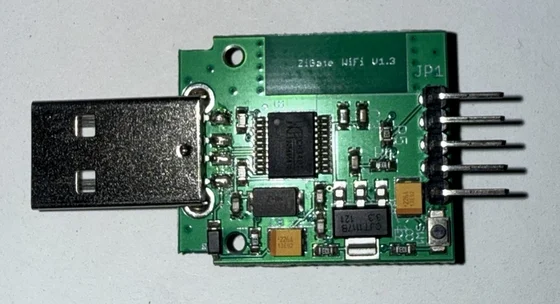
- Unplug the ZiGate, open the case and separate the two boards.
- Press the small button below the pins.
- Plug the Wi-Fi board into USB while holding down the button.
- Release the button once the board is connected.
- Click Choose USB port, select the port, then click Install firmware.
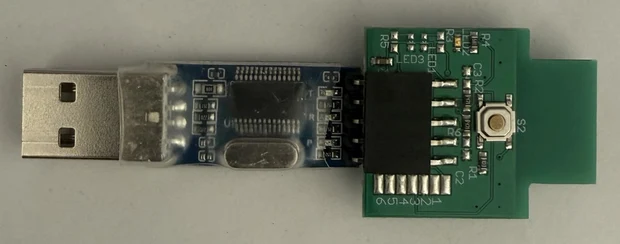
- With the USB‑TTL adapter unplugged, fit the radio onto it as shown.
- Press the radio’s S2 button.
- Plug the adapter into USB while holding down S2.
- Release S2 once the adapter is connected.
- Click Choose USB port, select the port, then click Install firmware.
1b. Set up Wi-Fi over USB
Wi-Fi firmware 1.1.1 is required. If Zigbee2MQTT ZiGate is running, stop it before setup.
- If the Wi-Fi module is already connected, unplug it. Connect only the Wi-Fi module, without pressing the button.
- Enter your router’s 2.4 GHz Wi-Fi details.
- Click Save Wi-Fi settings, then choose the USB port.
The COM port won’t open
- Close other flashing tabs and serial tools.
- In Windows Device Manager, check which port disappears when you unplug the radio adapter.
- Plug the adapter back in. In the port properties, note its name and any error code.
If Windows displays PL2303HXA PHASED OUT, open the guide below and follow the instructions for your version of Windows.
Optional · Clear old pairings
Leave the radio on the USB‑TTL adapter. Unplug the adapter, then plug it back in without pressing S2.
The reset clears paired devices and the old network settings.
3. Reassemble the ZiGate
- Unplug both boards. Remove the radio from the USB‑TTL adapter.
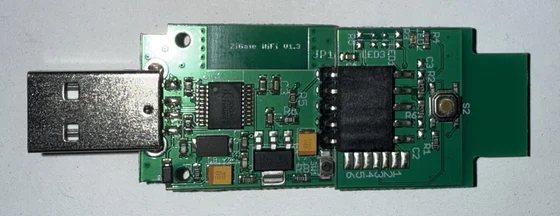
- Fit the radio onto the Wi-Fi module as shown.
- Plug the assembled ZiGate into USB without pressing the buttons.
- Find its IP address in your router’s device list.
Set up Wi-Fi via the ZiGate access point
- Connect the Wi-Fi module via USB without pressing the button. If the old network is still available, turn it off temporarily. The access point appears after about 45 seconds offline.
-
Read the access point name and key. Connect your computer to that network.
Choose the USB port used to flash the Wi-Fi module. Leave the ZiGate plugged in and use the displayed key to join ZIGATE-….
- ZiGate network
- ZiGate network key
- Once connected to ZIGATE-…, open 192.168.4.1. Enter the name and password of your router’s 2.4 GHz Wi-Fi network. After the restart, reconnect your computer to your router and find the ZiGate IP address in the router’s device list.
If the USB port doesn’t appear in Windows, open the Windows USB drivers page.
4. Install the Zigbee2MQTT ZiGate app
- Click Add the ZiGate repository, then install Zigbee2MQTT ZiGate from the Home Assistant store.
- Under Configuration, enter the ZiGate IP address. If you already have a Zigbee network, choose a different channel. Save the settings.
- Choose an MQTT broker before starting the app.
Use the address shown after USB setup or the one listed by your router.
Home Assistant Container and YAML configuration
With Home Assistant Container, run a second Zigbee2MQTT instance with its own data directory. Enter your MQTT broker’s address and choose a Zigbee channel different from the one your first network uses.
homeassistant:
  enabled: true
mqtt:
  base_topic: zigbee2mqtt_zigate
serial:
  adapter: zigate
port: tcp://192.168.1.50:99995. Set up MQTT and pair your first device
Keep using your current broker. Mosquitto in Home Assistant is detected automatically. For an external broker, enter its address and credentials under Zigbee2MQTT ZiGate → Configuration → External MQTT broker.
If MQTT is already connected to this broker, proceed to pairing. Otherwise, configure the MQTT integration using the same broker.
On Home Assistant OS, open the MQTT setup wizard and select the official Mosquitto broker app. Home Assistant installs Mosquitto and sets up the connection.
Open the MQTT setup wizardOn Home Assistant OS, install Mosquitto broker from the store and start it. Under Settings → Devices & services, configure the discovered MQTT integration and confirm the Mosquitto connection.
Open Mosquitto broker- Start Zigbee2MQTT ZiGate, then click Open Web UI.
- Click Permit join, then put your device in pairing mode.
- Find your device under Settings → Devices & services → MQTT.
Turn on Show in sidebar in the app to access the ZiGate interface from the sidebar.